
Support Center > AML verification
How to Complete AML Verification on Koinpark?
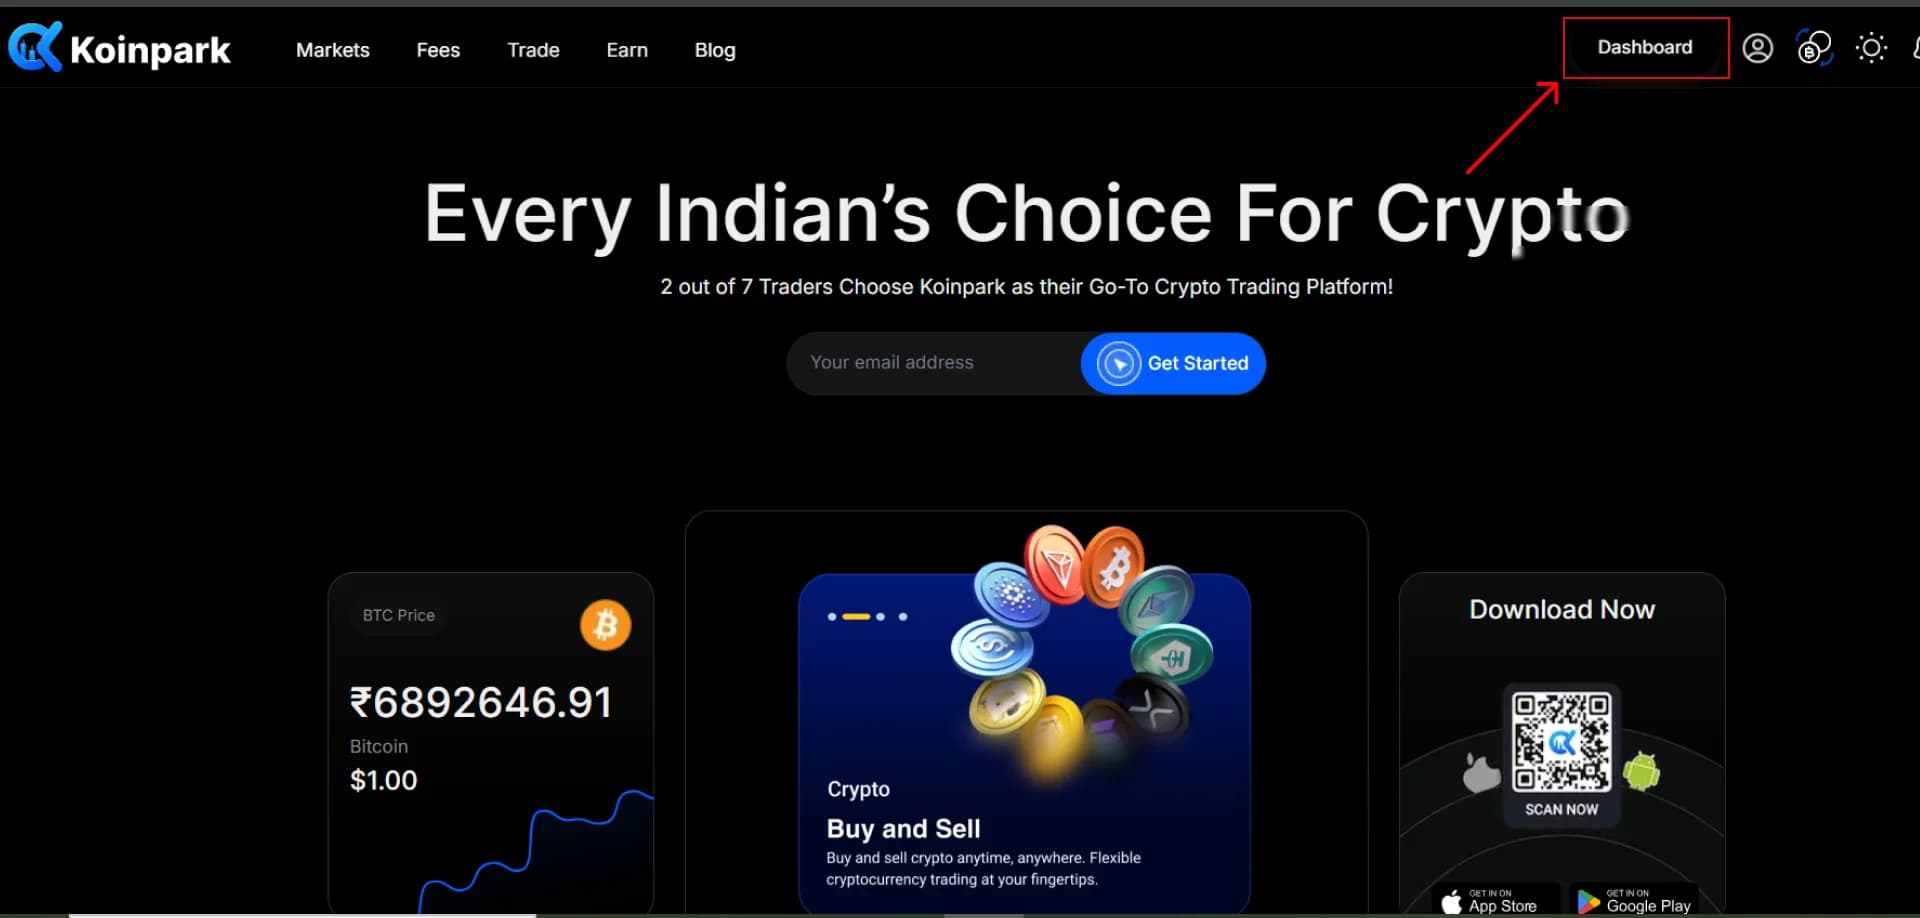
o complete your AML Verification, go to your [Dashboard].
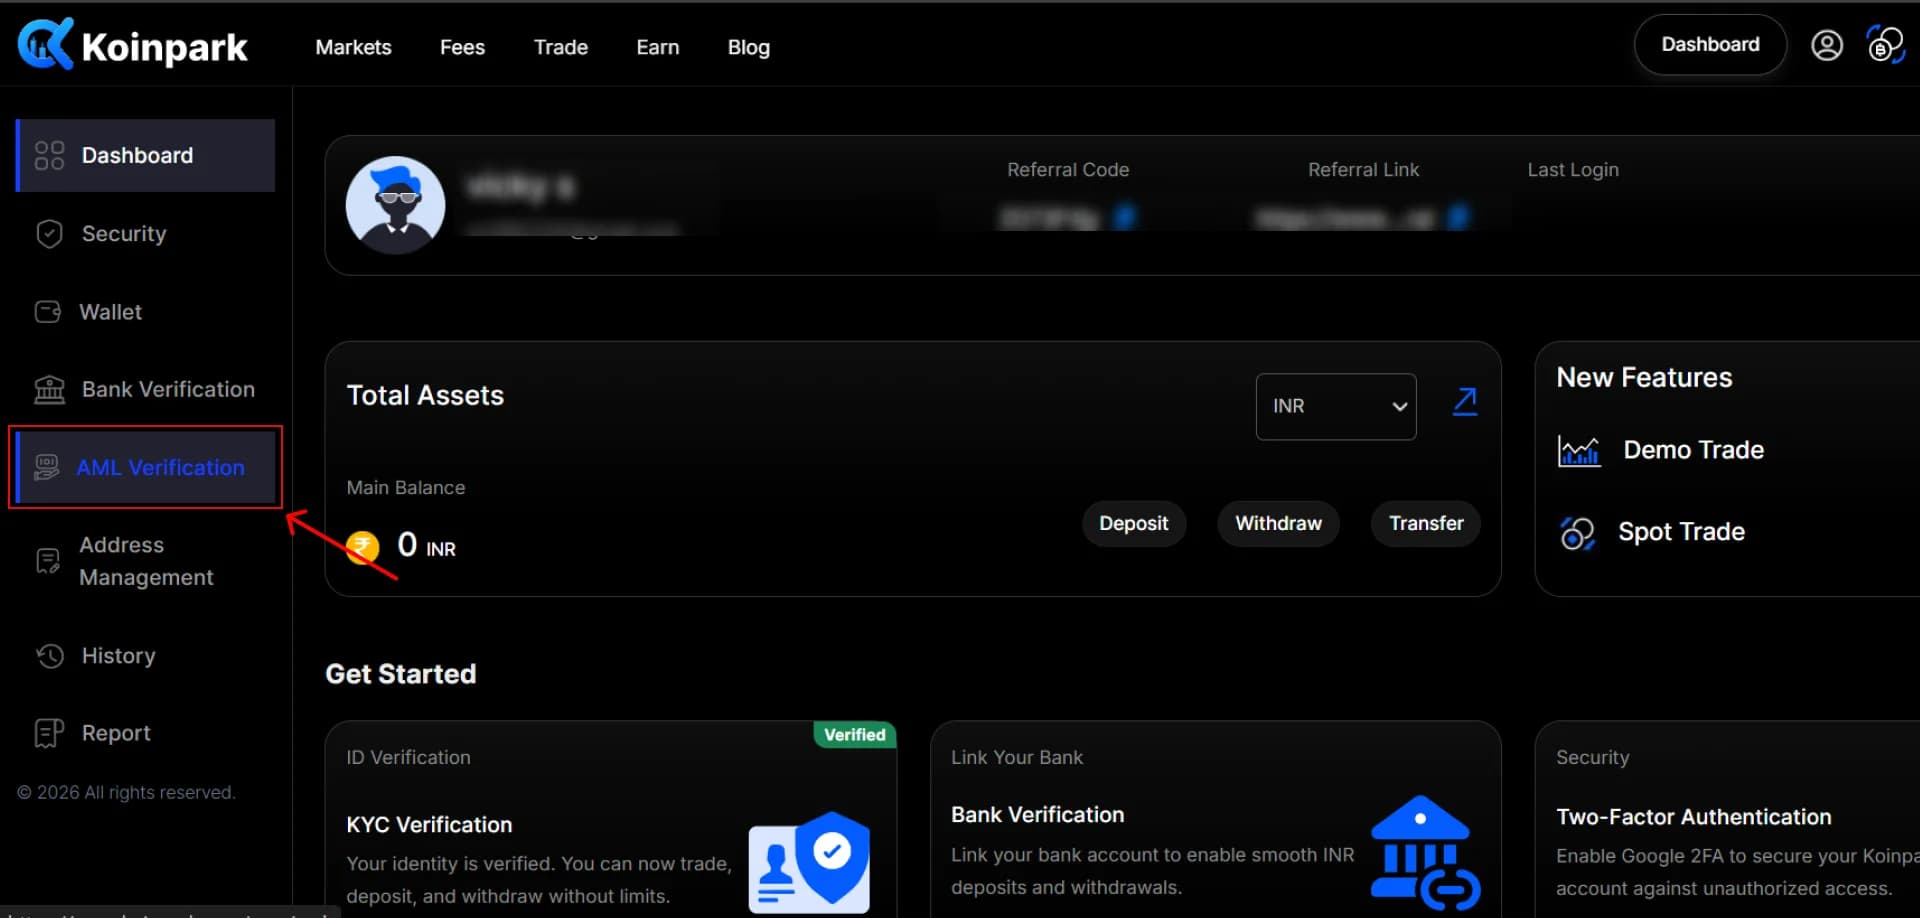
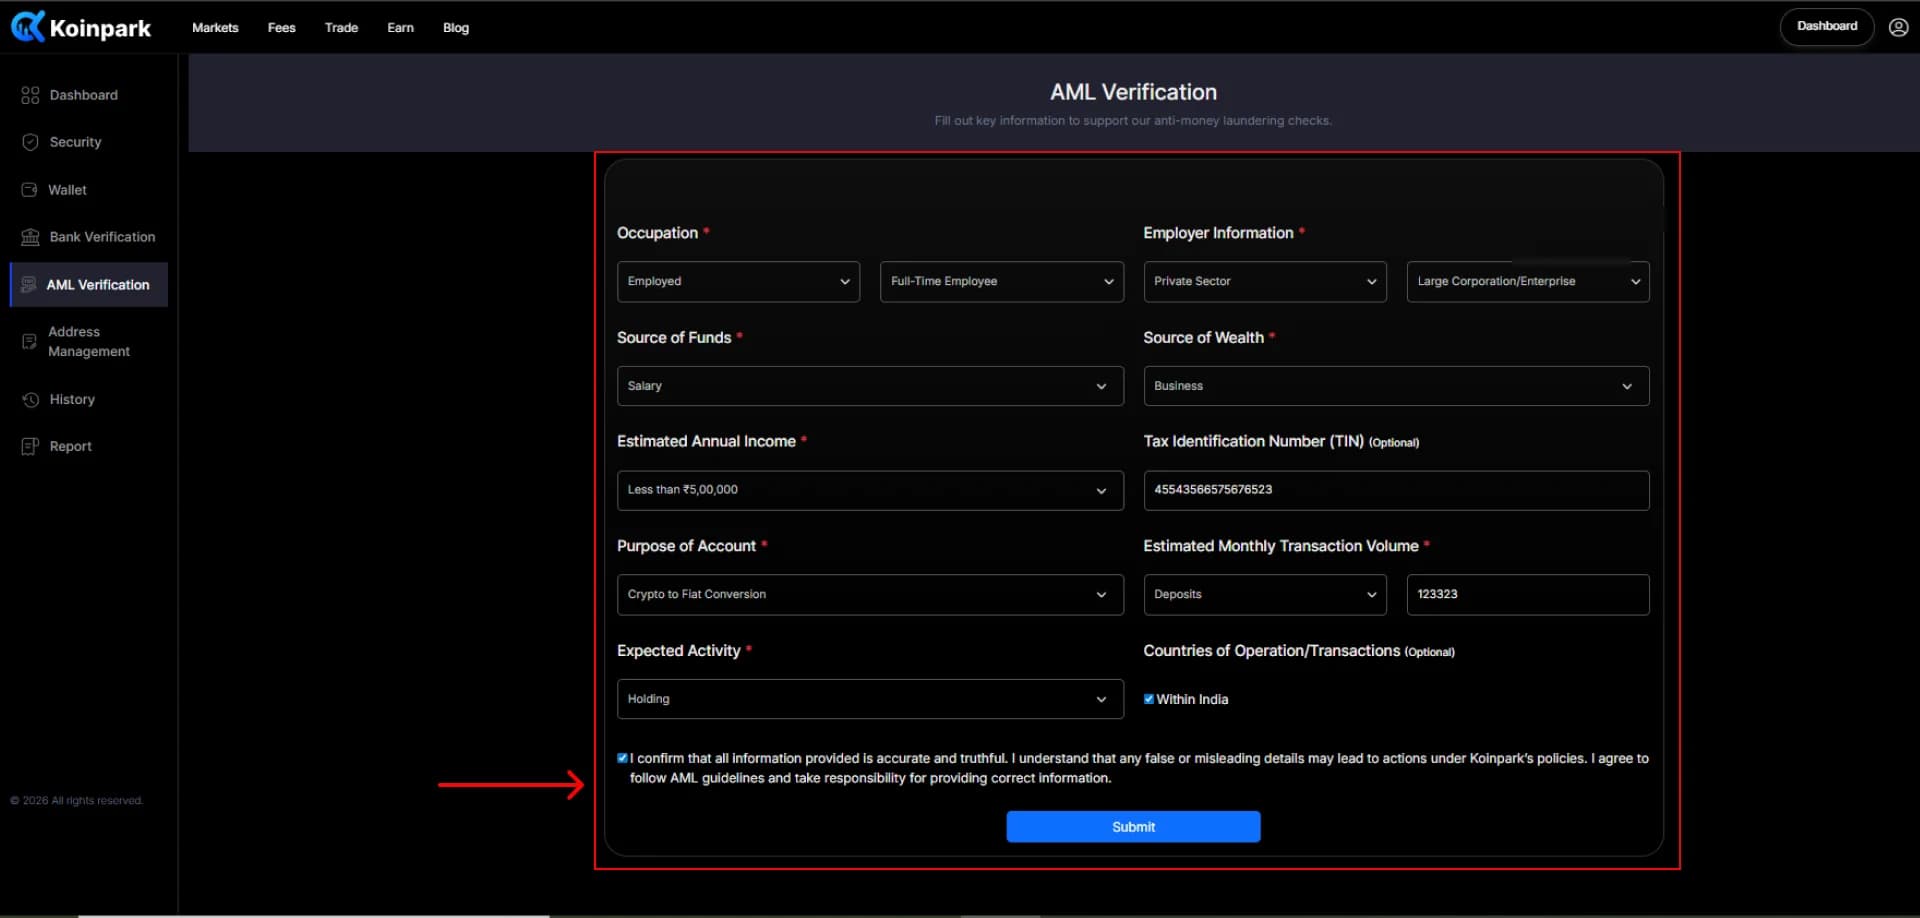
Then click on the [AML] section. Fill in the details one by one.
Step 1: Occupation
Select your current occupational status from the list:
- Employed
- Self-employed
- Unemployed
- Student
- Retired
- Homemaker
Then, choose the specific role based on your selection.
Example: If you select Employed, you can choose Full-Time Employee or Freelancer/Independent Contractor.
Step 2: Employer Information
Select the type of organization you work for:
- Private Sector
- Public Sector
- Self-employed
- Education
- Freelance/Independent Employers
Then, choose a relevant subcategory.
Example: If you select Private Sector, choose Large Corporation/Enterprise or Start-up Company.
Step 3: Source of Funds
Select your primary source of funds:
- Salary
- Investments
- Business Income
- Others
Step 4: Source of Wealth
Choose the origin of your overall wealth:
- Property
- Business
- Employment
- Others
Step 5: Nature of Business
Select the industry or sector that best describes your or your employer’s business:
- Agriculture, Forestry, and Fishing
- Manufacturing
- Retail and Wholesale
- Construction and Real Estate
- Finance and Insurance
- Information Technology (IT)
- Healthcare and Social Assistance
- Education and Training
- Energy and Utilities
- Government and Public Sector
- Retail and Consumer Services
Step 6: Estimated Annual Income
Enter your approximate yearly income.
(Input field – e.g., ₹10,00,000)
Step 7: Tax Identification Number (TIN)
Provide your Tax Identification Number.
Step 8: Purpose of Account
Select the purpose of your account usage:
- Savings
- Business
- Investments
- Personal Use
Step 9: Estimated Monthly Transaction Volume
Input your expected monthly transaction amounts:
- Deposits - (eg., ₹1,00,000)
- Withdrawals - (eg., ₹₹60,000)
Step 10: Expected Activity
Enter your estimated trading activity for the year.
(Input field – e.g., ₹5,00,000 worth of trading annually)
Step 11: Countries of Operation/Transactions
Check the box if your transactions are within India.
Leave it unchecked if not.
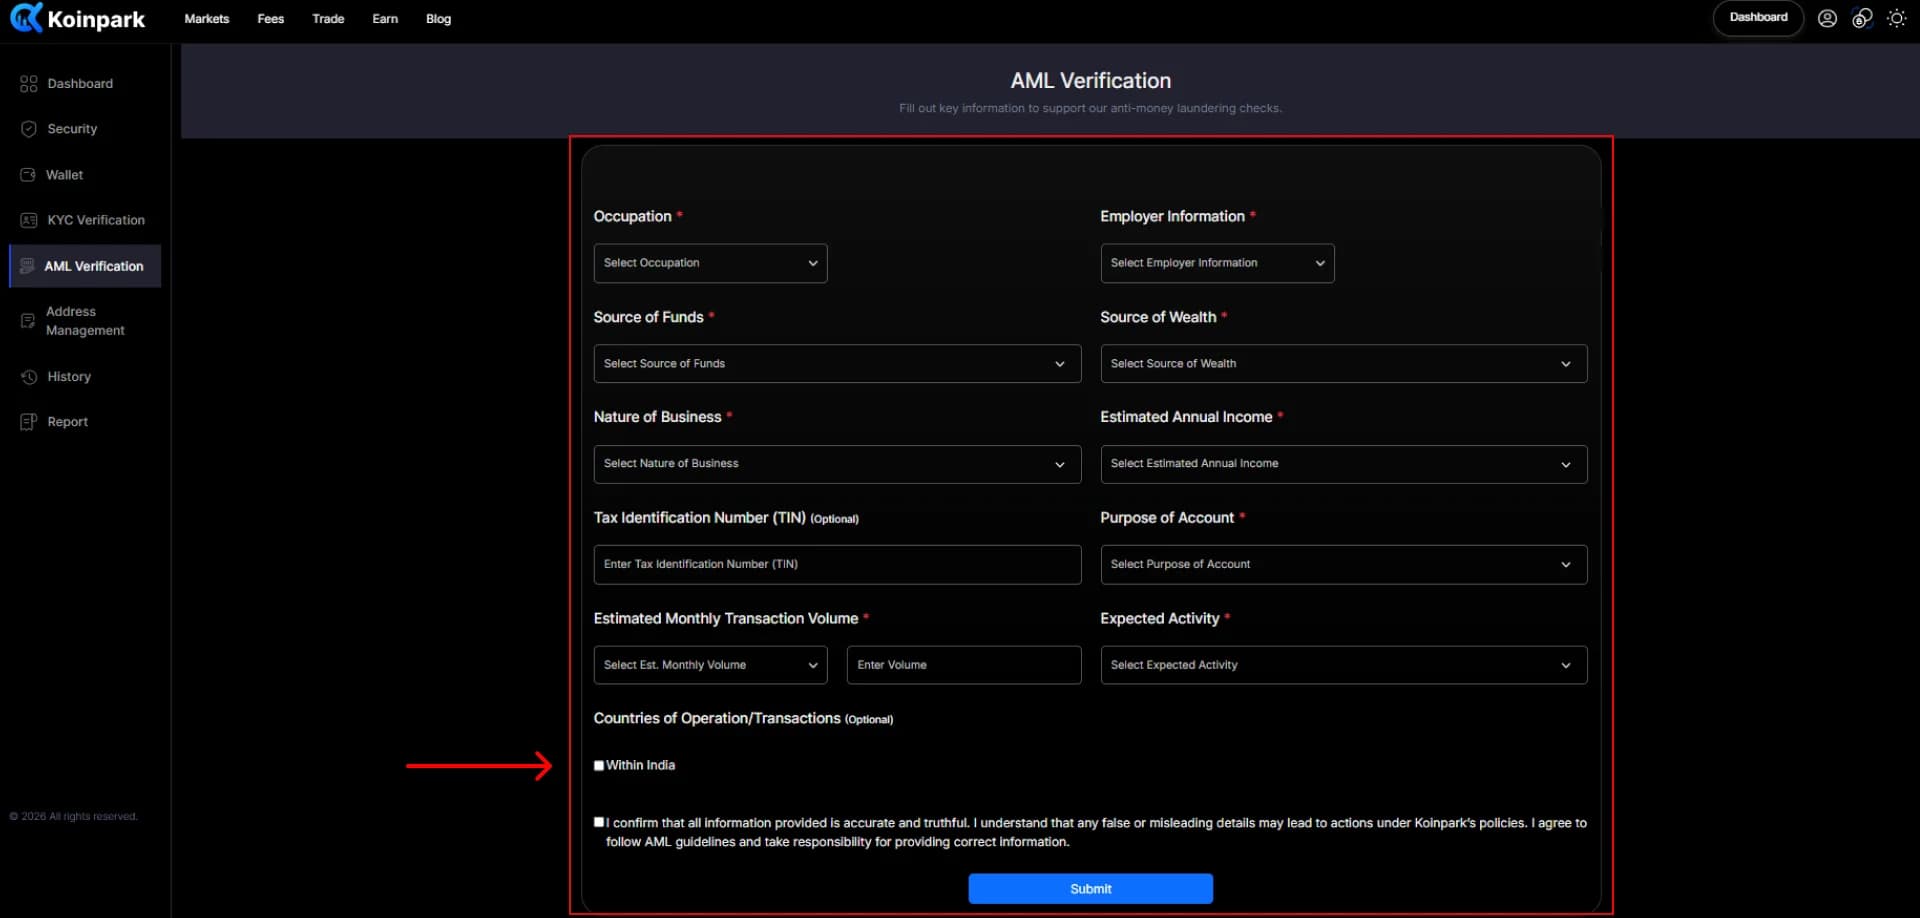
Final Step : Acknowledgement and Submission
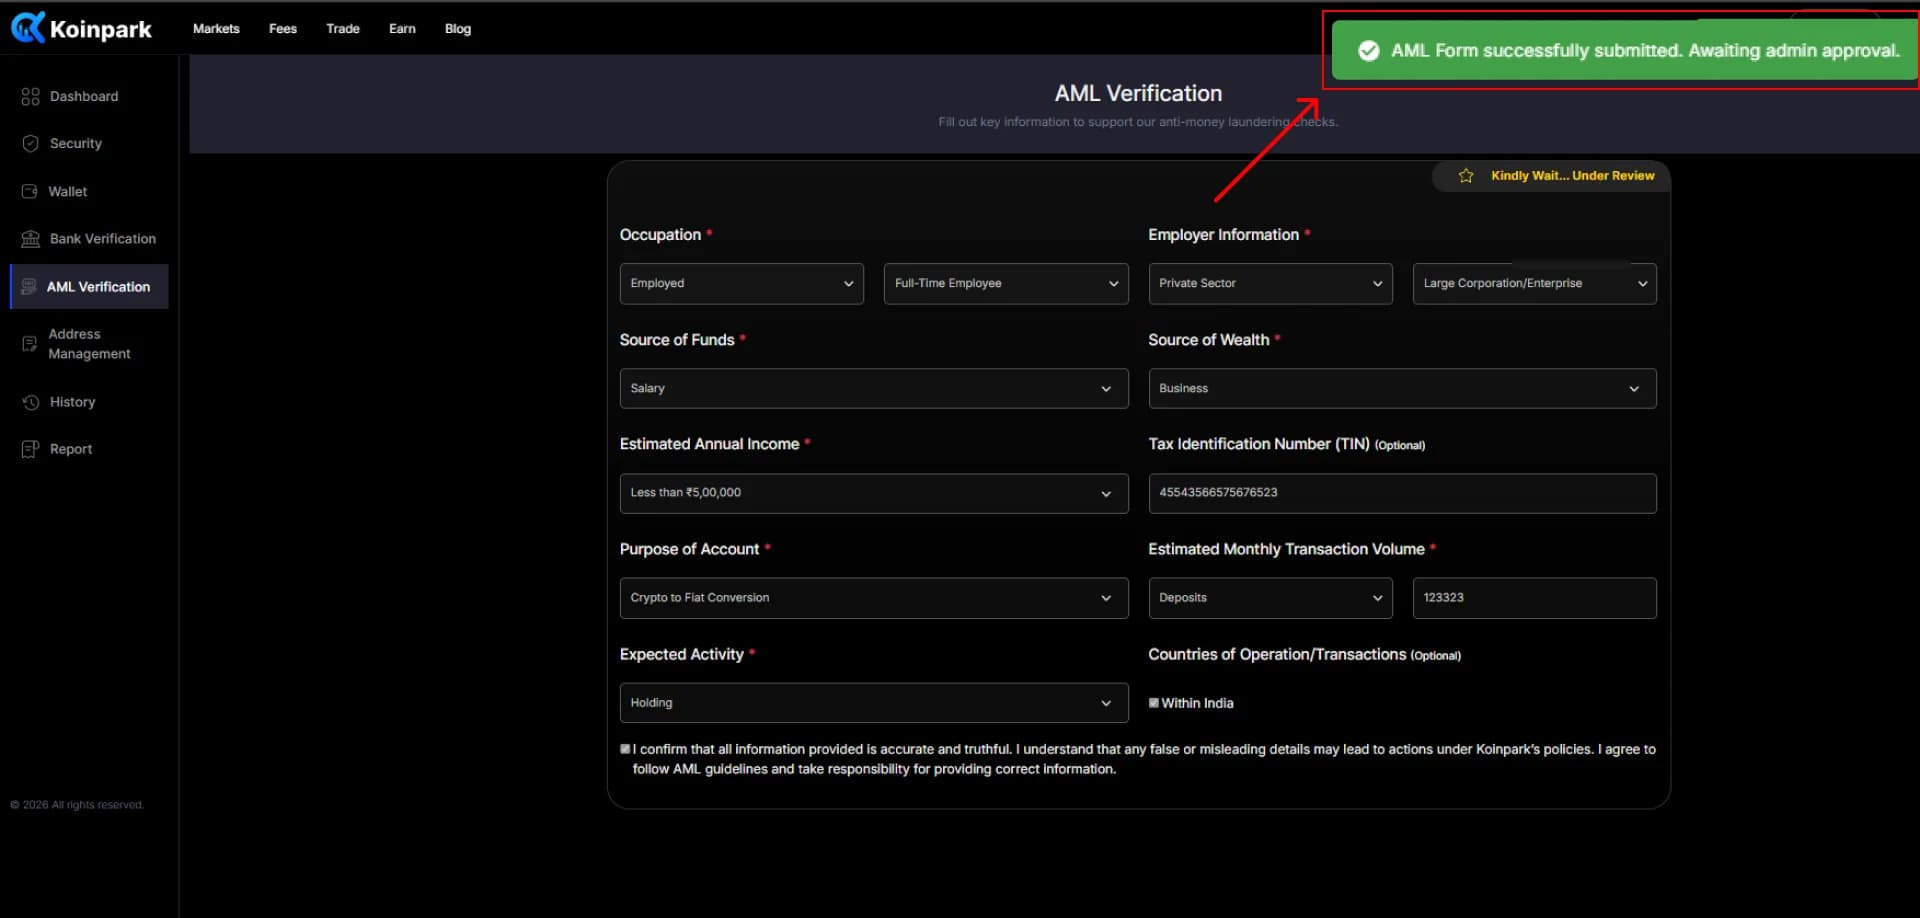
Check the box after reading the terms and conditions. Click the [Submit] button to complete your AML verification. At the end, you will get a notification message as shown below.
At last, the AML verification field will be updated as approved.